Words by Lyndsay, Senior Designer.
Quality versus quantity. Managing the pull of creative satisfaction against commercial constraints can be one of the trickiest lines to walk as a fabric designer.
Sure, your designs need to be beautiful, unique, on-trend, and commercially viable. But just as important (as if that wasn’t enough) is creating your prints in the most time-efficient way. Why? Because in this industry time is money - and us designers have to eat! The faster you can produce a saleable design, the more money you make for your time.
Luckily with experience comes an abundance of tricks and tips to speed up your design process - and actually make you enjoy working at a commercial pace. We’ve put our heads together in the studio to share some simple time-saving photoshop solutions to have you boosting your speed in no time.

PACE PROBLEM 1:
"How can I quickly but seamlessly colour in my motifs? "
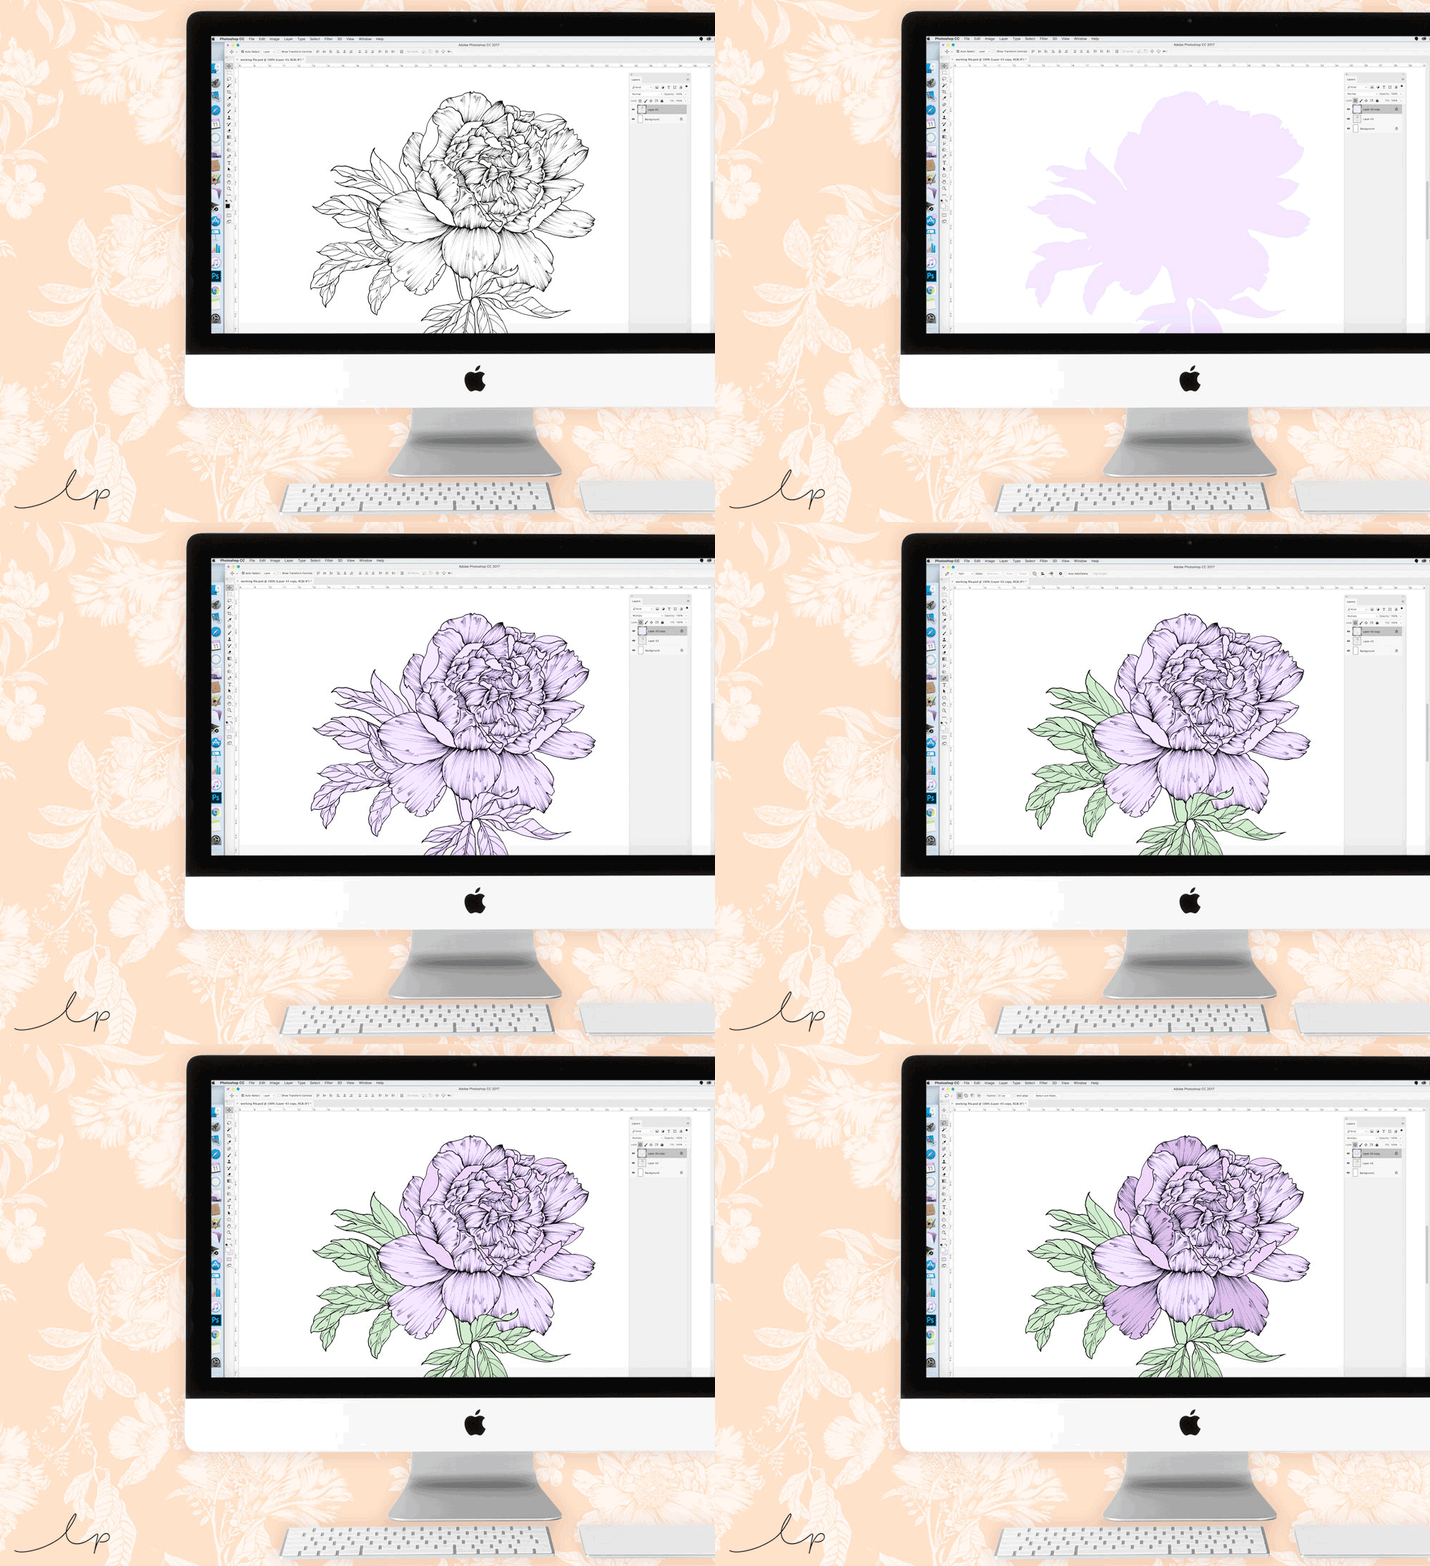
Carefully adding colour to your drawn elements is fundamental to creating attention to detail in your design. It’s well worth taking the time to do this properly, but no stress - here’s a failsafe way of seamlessly colouring in your elements without any missed sections or mishaps.
HOW TO:
Duplicate your motif onto a new layer, lock it and fill it with colour.
Next, change it to a multiply layer, merge the layers together, and you’ll have a perfectly coloured-in flower.
Add other colours to the multiply layer before merging for extra detail.

PACE PROBLEM 2:
"How can I quickly select lots of different areas in my design? Every time I lift my wacom pen I lose my lassoed selection!"
Your motif is almost finished and ready to place in a layout - there are just a few little sections that you want to add a pop colour to (always a good idea). Sure, you could do each section one by one - or with one simple trick you can select all the areas you want and then quickly edit them all at once. How so? The humble shift key. Holding this down while you select enables you to add to what you’ve already selected instead of starting a new selection.
HOW TO:
Using the lasso tool (shortcut ‘L’), hold down the shift key and draw the area of everything you want to select. Lift the pen as many times as you want without losing any of your selected area.
Want more great insider hacks? Download your free copy of Time-Saving Secrets for Stunning Tropical Foliage Designs. And find about our limited-time special offer for our most mind-blowing Photoshop course. This is the one we use to rain our in-house designers!

PACE PROBLEM 3:
"I’ve got a million elements on separate layers and I just want to see the one I’m working on."
Creating a busy floral design? Between hundreds of flowers and a forest of leaves, it’s easy to get a bit lost in your layers. (You know it’s bad when Photoshop freezes just from the amount of time it takes you to scroll through your layers panel.) Here’s an easy trick to just see the element you’re working on.
HOW TO:
Hold down ‘option’ and click on the ‘eye’ symbol of the layer you’re working on to isolate it from the rest.
Continue working on your chosen layer and once happy, repeat the shortcut to return the rest of your elements into view. Easy.

PACE PROBLEM 4:
"There’s a teeny white halo around my key lines after cutting them out. Help!"
An easy mistake to make when you're trying to be fast. Don’t waste time attempting to colour them in with the brush tool - or even worse cutting them off by eye. The quickest way is to use the modify function to shortcut your way to smooth black lines.
HOW TO:
With the magic wand (‘W’) select outside of your key line, (make sure contiguous is not ticked).
Then go to Select, Modify, Expand and choose 2 pixels (or more if you’ve got a lot of white to cut out).
Go again to Select, Modify, Smooth and choose 1-2 pixels, then hit delete.
If you’ve got any white left, simply lock your layer and fill it with black to make sure no pesky white halos remain.
Want some help with the drawing part of the design process? Read our post Illustrative Blooms: Secrets to Drawing Stunning Flowers for Fabric Design for more studio-approved tips.

PACE PROBLEM 5:
"Manually re-selecting the colours I want to work with is driving me nuts."
You’re whizzing through your design, colouring up your elements. That retro flower you're working on has both pink and orange petals and using the eyedropper tool every time you want to select the colour is becoming very tedious. Our trick? Have both colours in your toolbar and switch easily back and forth between them using the shortcut ‘X’. Trust us, it’s super simple but makes a huge difference in streamlining your colouring process.
HOW TO:
Simply hit ‘X’ on your keyboard to toggle between your background and foreground colours.
Learn to apply these tricks and we promise you’ll see an increase in your designing pace. And besides, having a time restriction per design doesn’t have to be a negative thing. It can help you learn to trust your creative instincts, making decisions faster. The more you flex this decision-making muscle, the easier it becomes to make snappy judgment calls when designing.
Get your extra insider hacks right now!

